Employees
Note: Work Tyme is free for up to three employees. Once you attempt to create your fourth employee you will be prompted to enter your credit card details into Stripe but this doesn’t necessarily mean you will start being billed (see billing for more information).
Add an employee
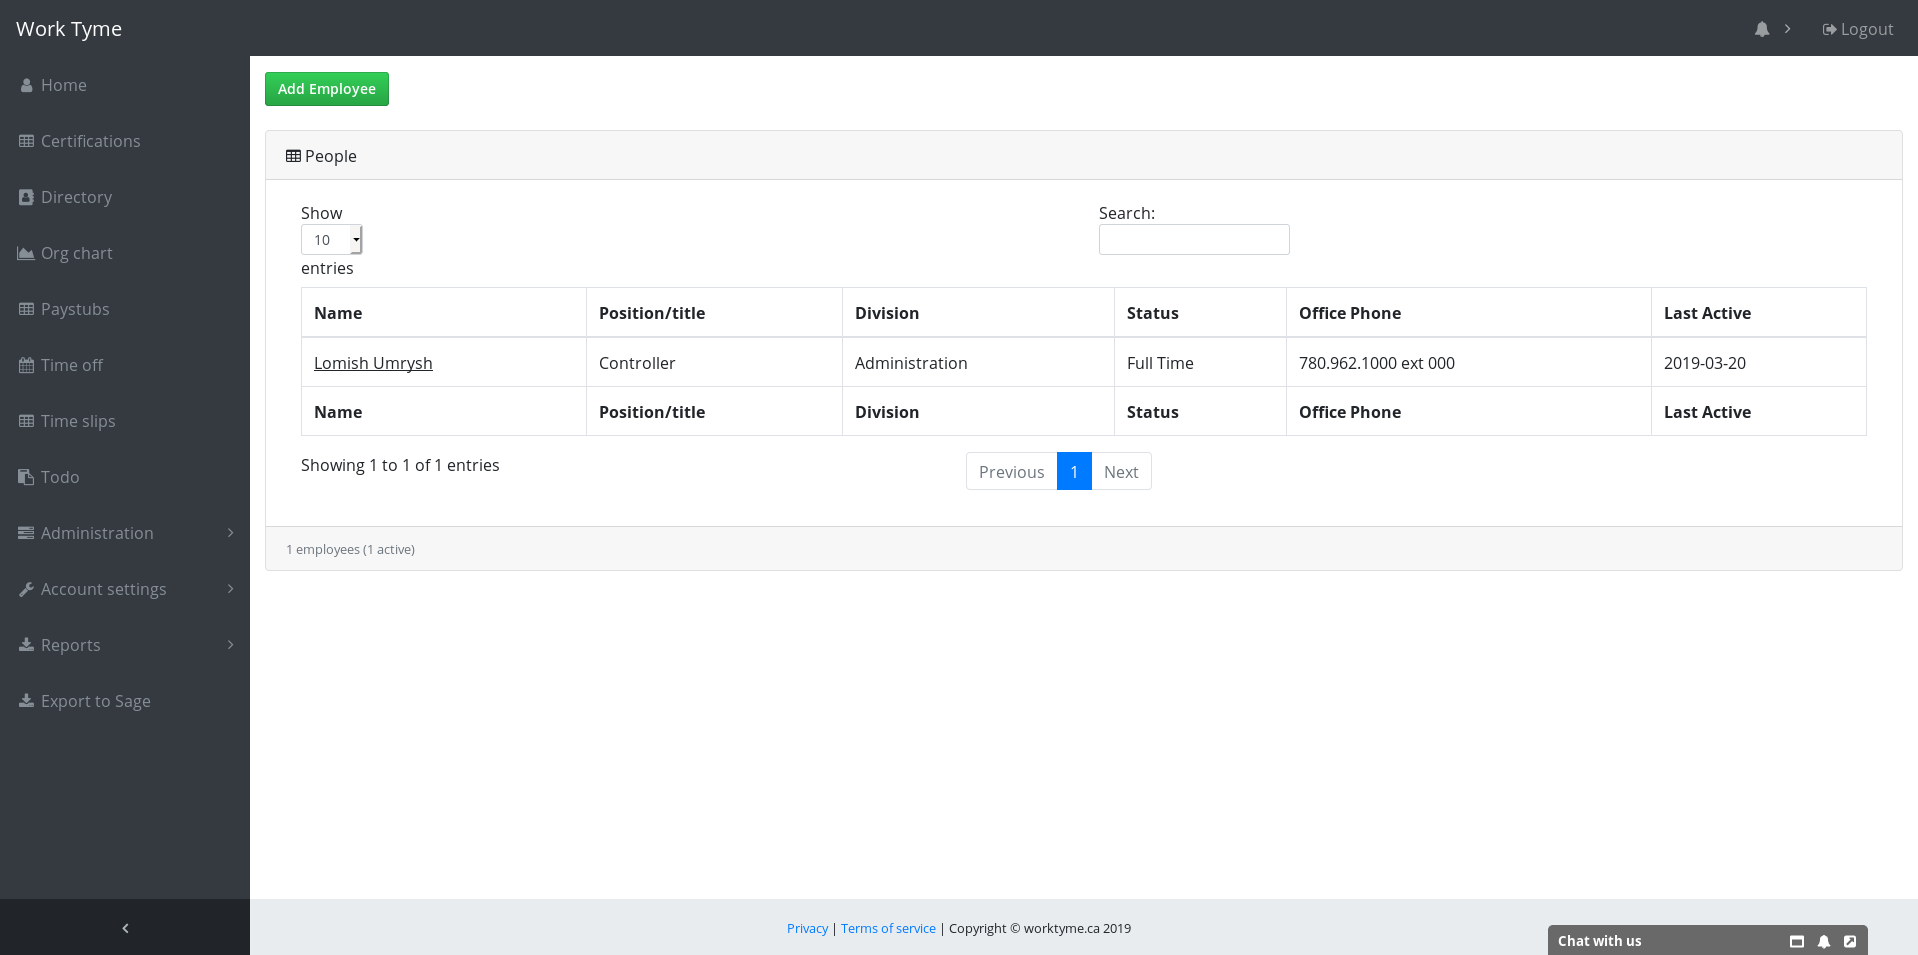
To add an employee navigate to the “Directory” menu option and click on the green “Add Employee” button above the list of employees
You will then be asked to fill in information about the new employee. If an item has a red asterisk beside it that means this field must be filled in when creating a new employee.
The first section is for the basic account information:
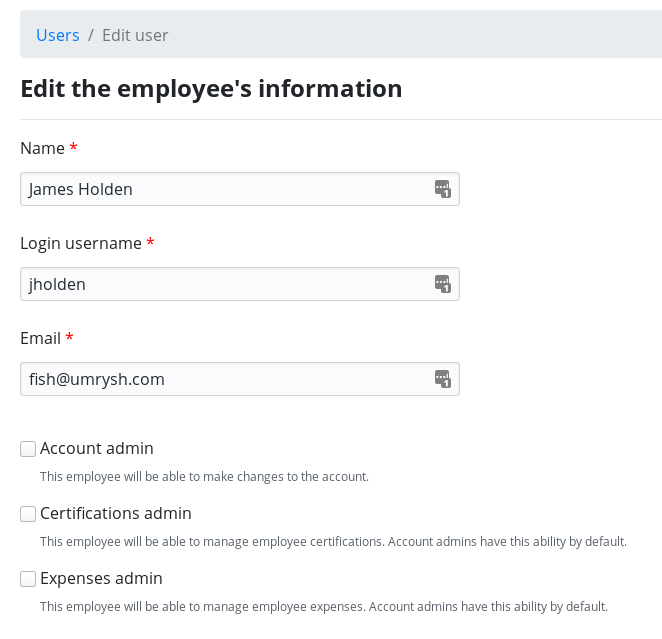
- Name: Enter the employee’s name. If you are exporting time slips to Sage 50 this must match the employee’s name in your Sage 50 system
- Login username: Employees can log into Work Tyme using either their email address or username
- Email: Work Tyme utilizes an employee’s email for forgot password links, time-off requests, login, etc
- Account admin: If an employee is an account admin they have full control of your entire Work Tyme account. Usually HR managers would be the only admins for your account
- Certifications admin: Work Tyme has a certifications module that allows you to upload PDFs of training certifications and assign them to the specific employees. Usually this is not handled directly by HR but by the Health & Safety team members.
- Expenses admin: An expenses admin is a regular user account that has been given administrative rights to the expenses module for the company. They will be able to manage the company cards as well as manage all expenses uploaded to your company. They will also be able to download expense reports and lock expenses from being edited by regular users.
The next section deals more closely with HR specific information about the employee.
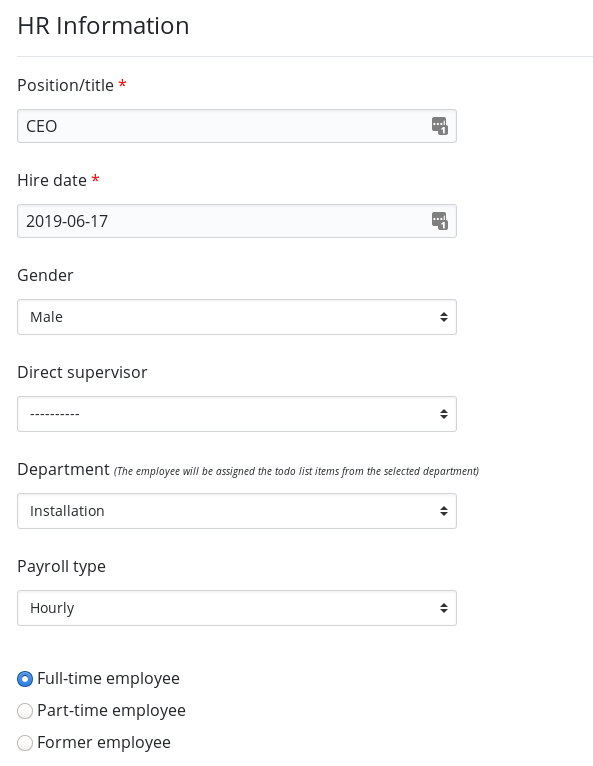
- Position/title: An employee’s title will show up on their listing in the staff directory, their internal company profile page, and on the organization chart
- Hire date: The date the employee joined your team. This date is also displayed on the employee’s internal company profile page
- Gender: Can be set to “Male”, “Female” or “Other”. Helpful as a reference to which pronouns an employee prefers to be addressed with
- Direct supervisor: An employee’s direct supervisor will be the person who receives all time-off requests for this employee and will be able to view all time slips they submit. This employee will be linked to on their supervisor’s internal company profile page as well as their supervisor will be linked from theirs. The integrated organization chart also utilizes this information to build the chart.
- Department: The company department to which the employee belongs. This is displayed on the employee’s profile page as well it is used to specify which todo list (onboarding template) should be assigned to them
- Payroll type: Use this field to specify if the employee is compensated via a salary or paid hourly
- Employee type: This information is displayed on the employee’s profile page. If the employee has left the company select the “Former employee” option and enter the date they left the company. Visit the former employees page for more information
Following the basic HR information we have a section about the employee’s time and cost.
- Vacation days per year: How many vacation days does this employee receive per year
- Vacation days remaining: How many vacation days does this employee still have available for the remainder of the current calendar year. This value is replenished each January 1st with the value entered in “Vacation days per year”. We also use this value when sending out time-off requests to the employee’s supervisor so that the supervisor is aware of how many vacation days the employee has remaining before they approve/deny the request. This value is allowed to go into the negative as we feel it is up to the supervisor and HR if they will to approve additional vacation days for an employee
- Sick days remaining: How many sick days does this employee still have available for the remainder of the current calendar year. Each January 1st this value will be updated with the amount entered for “Allowed sick days per year” on the general settings page for your company. There is no carry over of unused sick days in Work Tyme. We also use this value when sending out time-off requests to the employee’s supervisor so that the supervisor is aware of how many sick days the employee has remaining before they approve/deny the request. This value is allowed to go into the negative as we feel it is up to the supervisor and HR if they will to approve additional sick days for an employee
- Default hours for statutory holidays: When an admin enters a company wide holiday and chooses to not set custom hours this will be the amount of hours this employee is entitled to
- Employee cost per hour: This is currently utilized in the Payroll report

Next we can set if this employee will be responsible for approving any time slips as well we can set if they should be BCC’d on any time-off requests.
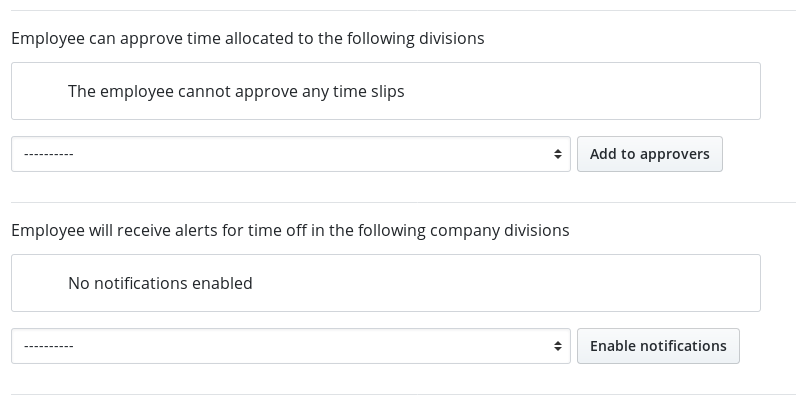
Employee can approve time allocated to the following divisions: Rather then have an employee be responsible for approving all time slips entered for a particular department (for example, “Manufacturing”) we instead go one level further and set approvers based on the divisions inside of the departments. For smaller companies you may have the same individual approving all the divisions in a department but in larger organizations you may have front line supervisors approving the hours for their individual job items. To make this employee an approver for a division select the division from the drop down list and click the “Add to approvers” button. Repeat this process for all the divisions they will need to approve.
Employee will receive alerts for time off in the following company divisions: When an employee requests time-off their direct supervisor will receive an email with information about the request and buttons to either approve/deny the request. If this particular employee should also be made aware of all time-off being requested in a particular department you can enable it here. For example your HR manager will likely wish to be alerted for all time-off in every department, or you may have a VP that oversees an entire department but does not have any employees directly reporting to them. To have this employee be alerted for time-off in a department select the department from the drop down list and click the “Enable notifications” button. Repeat this process for all the departments they will want to receive alerts from.
And finally we set the password for the new employee. You have an option of whether you wish for Work Tyme to send the employee a welcome email with their new password or not.
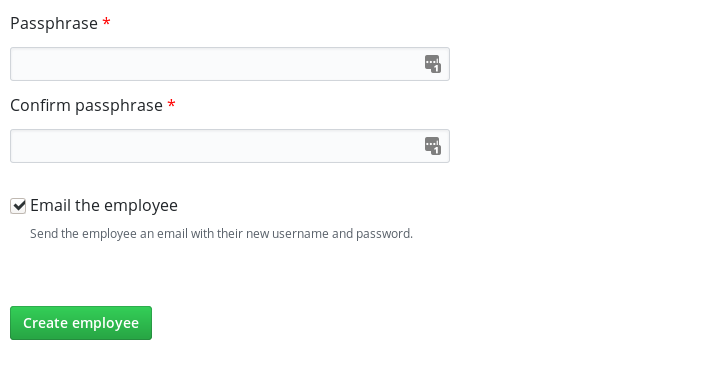
When finished entering all the data click the button labeled “Create employee” to create the employee.
Edit an employee
To edit an employee navigate to the “Directory” menu option and click on the name of the employee you wish to edit. You will then see a green button near the top right of the screen titled “Switch to advanced settings”. Click this button to edit the employee’s account information.
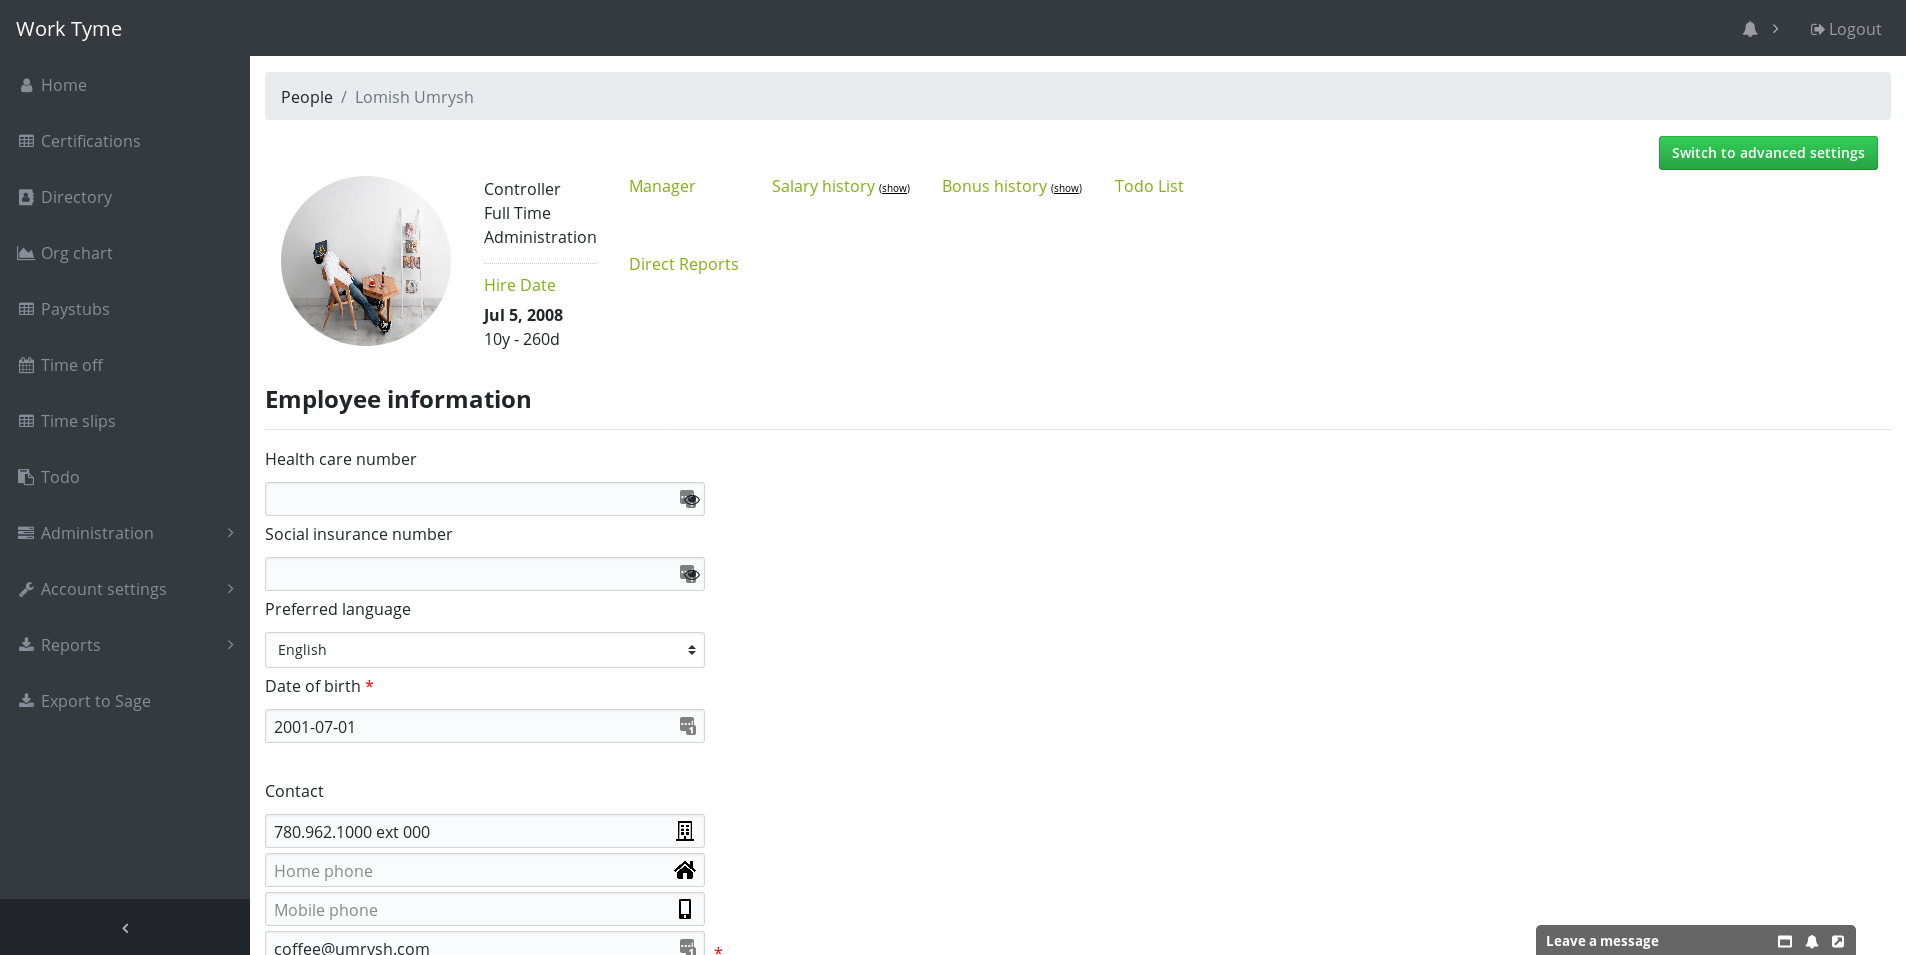
You will then be shown all the currently entered information about the employee’s account and be able to make changes to their information. If an item has a red asterisk beside it that means this field must be filled in.
The first section is for the basic account information:
- Name: Enter the employee’s name. If you are exporting time slips to Sage 50 this must match the employee’s name in your Sage 50 system
- Login username: Employees can log into Work Tyme using either their email address or username
- Email: Work Tyme utilizes an employee’s email for forgot password links, time-off requests, login, etc
- Account admin: If an employee is an account admin they have full control of your entire Work Tyme account. Usually HR managers would be the only admins for your account
- Certifications admin: Work Tyme has a certifications module that allows you to upload PDFs of training certifications and assign them to the specific employees. Usually this is not handled directly by HR but by the Health & Safety team members.
- Expenses admin: An expenses admin is a regular user account that has been given administrative rights to the expenses module for the company. They will be able to manage the company cards as well as manage all expenses uploaded to your company. They will also be able to download expense reports and lock expenses from being edited by regular users.
The next section deals more closely with HR specific information about the employee.
- Position/title: An employee’s title will show up on their listing in the staff directory, their internal company profile page, and on the organization chart
- Hire date: The date the employee joined your team. This date is also displayed on the employee’s internal company profile page
- Gender: Can be set to “Male”, “Female” or “Other”. Helpful as a reference to which pronouns an employee prefers to be addressed with
- Direct supervisor: An employee’s direct supervisor will be the person who receives all time-off requests for this employee and will be able to view all time slips they submit. This employee will be linked to on their supervisor’s internal company profile page as well as their supervisor will be linked from theirs. The integrated organization chart also utilizes this information to build the chart.
- Department: The company department to which the employee belongs. This is displayed on the employee’s profile page as well it is used to specify which todo list (onboarding template) should be assigned to them
- Employee type: This information is displayed on the employee’s profile page. If the employee has left the company select the “Former employee” option and enter the date they left the company. Visit the former employees page for more information
Following the basic HR information we have a section about the employee’s time and cost.
- Vacation days per year: How many vacation days does this employee receive per year
- Vacation days remaining: How many vacation days does this employee still have available for the remainder of the current calendar year. This value is replenished each January 1st with the value entered in “Vacation days per year”. We also use this value when sending out time-off requests to the employee’s supervisor so that the supervisor is aware of how many vacation days the employee has remaining before they approve/deny the request. This value is allowed to go into the negative as we feel it is up to the supervisor and HR if they will to approve additional vacation days for an employee
- Sick days remaining: How many sick days does this employee still have available for the remainder of the current calendar year. Each January 1st this value will be updated with the amount entered for “Allowed sick days per year” on the general settings page for your company. There is no carry over of unused sick days in Work Tyme. We also use this value when sending out time-off requests to the employee’s supervisor so that the supervisor is aware of how many sick days the employee has remaining before they approve/deny the request. This value is allowed to go into the negative as we feel it is up to the supervisor and HR if they will to approve additional sick days for an employee
- Default hours for statutory holidays: When an admin enters a company wide holiday and chooses to not set custom hours this will be the amount of hours this employee is entitled to
- Employee cost per hour: This is currently utilized in the Payroll report
Next we can set if this employee will be responsible for approving any time slips as well we can set if they should be BCC’d on any time-off requests.
Employee can approve time allocated to the following divisions: Rather then have an employee be responsible for approving all time slips entered for a particular department (for example, “Manufacturing”) we instead go one level further and set approvers based on the divisions inside of the departments. For smaller companies you may have the same individual approving all the divisions in a department but in larger organizations you may have front line supervisors approving the hours for their individual job items. To make this employee an approver for a division select the division from the drop down list and click the “Add to approvers” button. Repeat this process for all the divisions they will need to approve.
Employee will receive alerts for time off in the following company divisions: When an employee requests time-off their direct supervisor will receive an email with information about the request and buttons to either approve/deny the request. If this particular employee should also be made aware of all time-off being requested in a particular department you can enable it here. For example your HR manager will likely wish to be alerted for all time-off in every department, or you may have a VP that oversees an entire department but does not have any employees directly reporting to them. To have this employee be alerted for time-off in a department select the department from the drop down list and click the “Enable notifications” button. Repeat this process for all the departments they will want to receive alerts from.
When finished entering all the data click the button labeled “Update employee information” to save the changes made to the employee.
Change an employee’s password
To edit the employee navigate to the “Directory” menu option and click on the name of the employee you wish to edit. You will then see a green button near the top right of the screen titled “Switch to advanced settings”. Click this button to edit the employee’s account information.
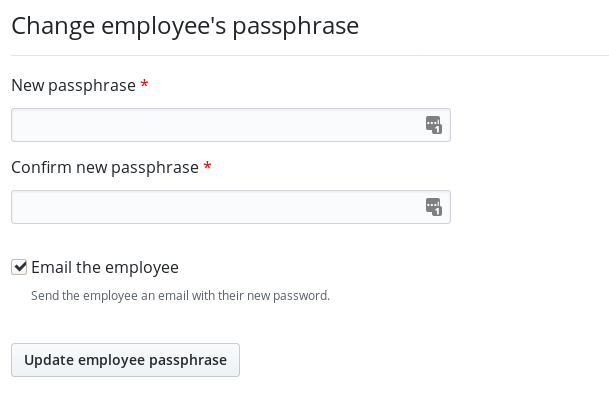
Scroll all the way to the bottom of the employee’s advanced settings page and you will see a section titled “Change employee’s passphrase”. If you do not wish for Work Tyme to email the employee a copy of their new password unselect the check box titled “Email the employee”. For example, if the employee has left your company you may wish to lock them out of their account by changing their password and therefore do not want Work Tyme to send them this new password. After you have entered the new password click on the button titled “Update employee passphrase” to save your changes.
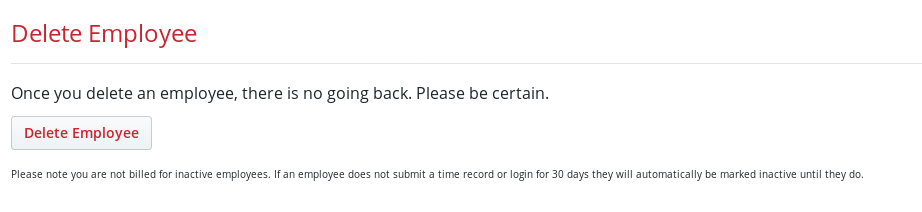
Delete an employee
To delete an employee navigate to the “Directory” menu option and click on the name of the employee you wish to edit. You will then see a green button near the top right of the screen titled “Switch to advanced settings”. Click this button to edit the employee’s account information.
Scroll all the way to the bottom of the employee’s advanced settings page and you will see a section titled “Delete Employee”. As is mentioned on the page itself please note you are not billed for inactive employees. If an employee does not submit a time record or login for 30 days they will automatically be marked inactive until they do. Please see billing for more information. If you truly wish to delete this employee and all associated records click on the button labeled “Delete Employee”